

In the ever-evolving world of graphic design, inspiration is everything. From branding projects to website layouts, designers need a strong foundation to guide their creative process. Enter the mood board – an indispensable tool that helps translate abstract ideas into a cohesive visual direction. Whether you’re a seasoned designer or a beginner, mastering the mood board can elevate your work and streamline your design journey.
What is a Mood Board?
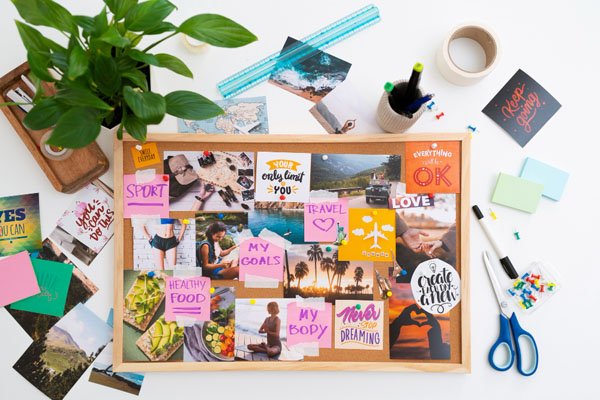
A mood board is a visual representation of a concept, idea, or theme. It typically includes images, colors, textures, typography, and other design elements that help define the creative direction of a project. Mood boards serve as a blueprint for inspiration, helping designers, clients, and stakeholders align their vision before diving into the actual design work.
Why Mood Boards are Essential for Designers
1. Clarifies Design Vision
A mood board allows designers to visually explore ideas and concepts before committing to a final design. It helps refine the project’s aesthetic and ensures that all elements work harmoniously.
2. Bridges Communication Gaps
Clients may not always be able to articulate their vision clearly. A mood board provides a tangible reference, making it easier for clients to understand and approve the creative direction.
3. Saves Time and Effort
Instead of diving straight into designing, a well-crafted mood board ensures that designers and clients are on the same page. This minimizes unnecessary revisions and accelerates the design process.
4. Encourages Creative Exploration
A mood board acts as a creative playground, allowing designers to experiment with different styles, compositions, and color schemes before settling on the final approach.
How to Create a Powerful Mood Board
Step 1: Define the Purpose
Before curating a mood board, determine its purpose. Are you creating a board for branding, a website, social media, or a marketing campaign? Understanding the objective helps you gather relevant visuals.
Step 2: Gather Inspiration
Start collecting images, textures, typography, and color palettes that resonate with the project’s theme. Platforms like Pinterest, Behance, and Dribbble are great sources of inspiration. You can also take photos, scan textures, or use magazine cutouts.
Step 3: Organize Your Elements
Arrange your collected elements cohesively. You can do this digitally using design tools like Adobe Photoshop, Illustrator, Canva, or Milanote, or create a physical board if you prefer a hands-on approach. Keep your layout clean and well-structured to convey the desired aesthetic effectively.
Step 4: Refine and Finalize
Review your mood board and remove any elements that feel out of place. Ensure that all components work together to tell a compelling visual story.
Step 5: Present and Gather Feedback
Share the mood board with your client or team to ensure everyone is aligned on the design direction. Be open to feedback and make necessary adjustments before moving forward with the actual design phase.
Final Thoughts
A well-crafted mood board is more than just an inspiration collage; it’s a strategic tool that helps designers visualize concepts, communicate ideas effectively, and refine their creative direction. By mastering the mood board, you not only enhance your design process but also create compelling visuals that resonate with your audience. So, the next time you start a new project, take a step back and craft a mood board first – your future self will thank you!